

Developing an API is more relaxed than documenting an API. So how can we document an API? We have some tools that can generate the API documents for us automatically. We will see how we can document the Spring boot API with Swagger2.
Swagger2 is a fantastic tool to document the REST API. API Properties can be described in JSON or YAML metadata in Swagger2. The Swagger UI is a beautiful thing to view our API. It will generate HTML documentation using the swagger2 metadata. More than that, we can use this API like Postman to test our API, as well.
SpringFox
It is a project which gives automated JSON documentation for APIs built with Spring. We want to update the documentation whenever the code gets changed. SpringFox will do this for us. It can automatically inspect our classes, detect Controllers, their methods, model classes they use, and URLs to which they are mapped.
How can you start to document?
Did you have a REST API? Then you can document your REST API using swagger2 with the following sections. If you don’t have a REST API, don’t worry, clone my Git repository and check out the “start-point” branch.
You will have an undocumented Spring boot REST API.
Adding the Maven Dependencies in the pom.xml
Swagger2 version 2.9.2 is used in this article. This is the latest version of swagger2. We want to integrate the swagger2 using springFox. If you are using the Maven, add this in your pom.xml file.
Basic configuration for Swagger2
After adding the dependency, we have to configure the swagger behaviour of our API documentation with docket bean. Creating a SwaggerConfig class to configure the swagger is one of the good practices in java.
@EnableSwagger2 is the annotation that tells Swagger support will be enabled. This annotation is provided by SpringFox. For the swagger configuration, we have to create a docket bean instance. The docket bean is used to configure the swagger documentation behavior. Swagger will look at this docket bean instance and figure out how it needs to document your spring application.
Here, We initialize the Docket bean instance that is configured Swagger2 documentation with this “new Docket(DocumentationType.SWAGGER_2)” line. We have a builder pattern to manipulate the docket instance for the swagger configuration.
The select method is used to call the ApiSelectorBuilder, which provides the methods to customize the swagger behavior. After all configuration, we will call the build() method to get the prepared docket bean instance.
We configure the Swagger2 documentation to our REST API with this basic configuration now. You can check that, using the following request on your Browser. Make sure that, Your Spring boot Application is running on port 8080.
http://localhost:8080/v2/api-docs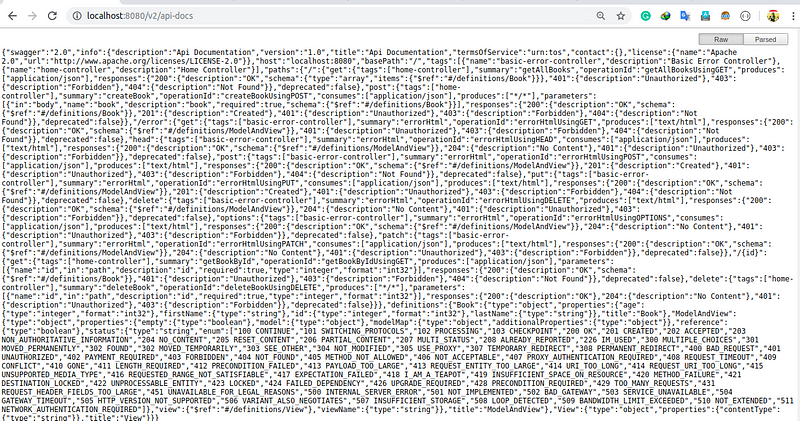
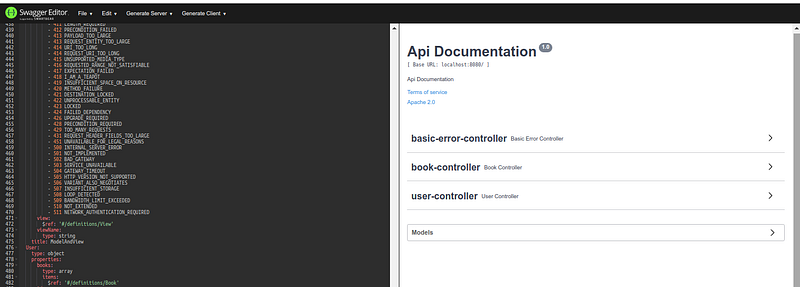
Swagger2 is working, and our API is documented. You can view the HTML documentation in the Swagger Online Editor. Go to this link, paste your Big JSON object which was the response of the http://localhost:8080/v2/api-docs.
Why we have to go to that URL and paste it every time to view the documentation? Don’t we have an easy way to generate the HTML report? The Answer is Swagger UI.
Swagger UI
The HTML Documentation GUI can be achieved using swagger UI. For that, you want to add the following maven dependency to your pom.xml file
After adding the maven dependency, restart your Spring boot Application and navigate to following HTTP URL. You will see what you want.
http://localhost:8080/swagger-ui.html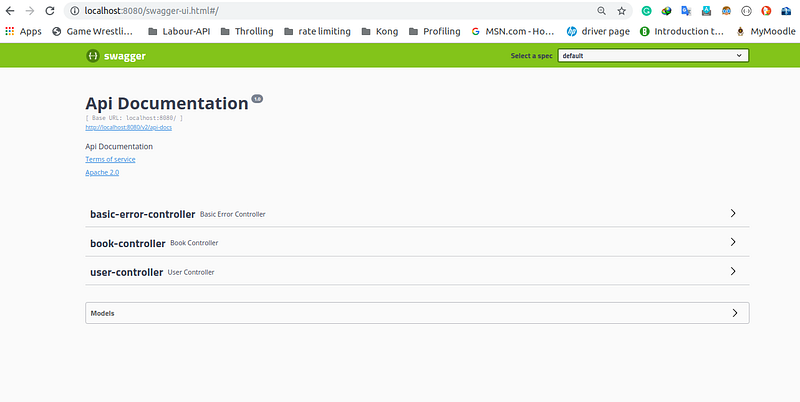
Customizing Swagger2 Documentation
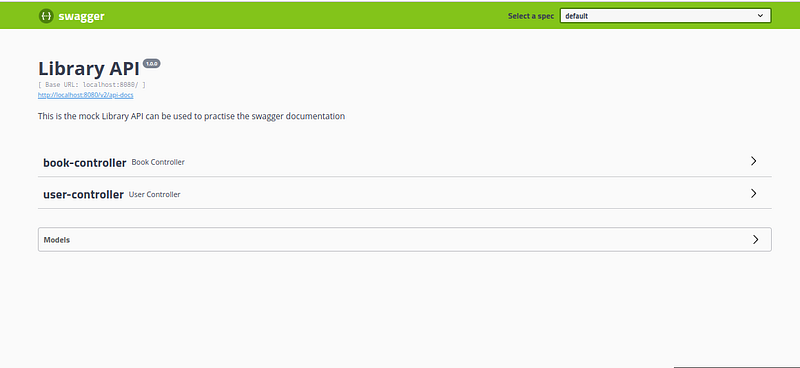
We have created a book-controller and user-controller, but there is another controller, which is named as basic-error-controller. What is this basic-error-controller? How can we get rid of this?
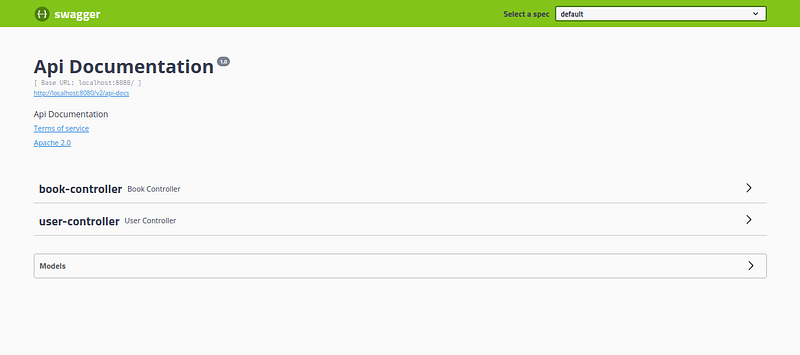
For that, we need to know about paths() and apis() of apiSelectorBuilder. ApiSelectorBuilder paths() method is used to configure the paths of the APIs, which should be covered by the swagger documentation. Paths can be set by pathSelectors. PathSelectors provide additional filtering with predicates that scan the request paths of your application and set them for your needs. You can use any(), none(), regex(), or ant().
When we write the controllers, we have used the @RestController annotation. We can filter the controllers with this annotation. For that, we want to use the RequesthandlerSelector with class annotation in the apis() method of apiSelectBuilder class since apis() allows selection of request handler’s using a predicate. So in the SwaggerConfig class, we have changed like below.
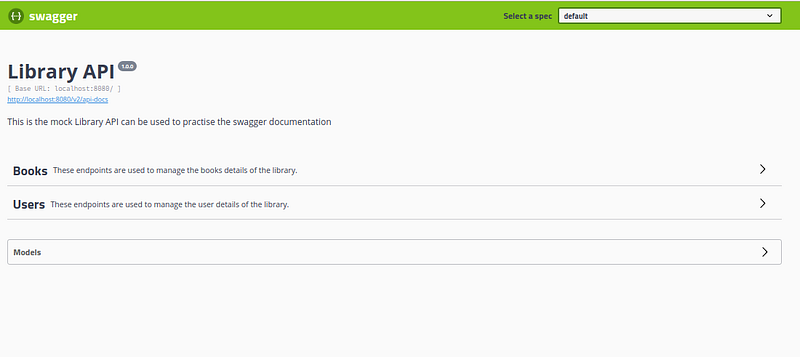
The apis() and paths() documentation can be found here. You can filter the things that you need by following the document. After this configuration, when you restart the spring boot application, your UI should look like the below image.
So now, we have our book-controller and user-controller. How can we update the summary documentation of Our API? We can do it with the ApiInfo instance.
We can define a new method in the SwaggerConfig class, which can give the ApiInfo instance, then we will pass that instance into the apiInfo() method of the docket bean.
After this configuration, Our API Documentation will be changed like the below image.
Cool. We have changed the information of the API to what we want.
Customizing each place of the documentation using annotations
It’s good, but for better documentation, we want to document each controller, endpoint, parameter, responses, and HTTP Code as well.
Customizing the Controller’s information
We can customize the controller with @Api annotation. Basically, @Api marks the class as a swagger resource. The best practice to set the description of the controller is using tags.
How can we set the tags?
First, we have to set the annotation in the controller class, and there we have to give a value for the “tags” field.
@Api(tags = "Books")
public class BookController{
}
After that, when you configure the docket bean, you have to add the tags() method after building the docket bean.
Now, We have added the details for the controller. Here, we have given some numbers in the Tag. The number defines the order of the controller in the document.
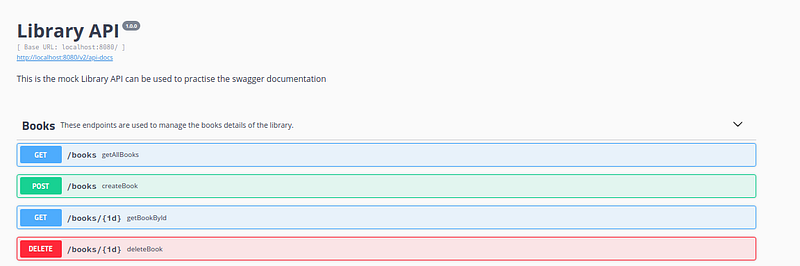
After this, code changes the swagger documentation looks like below.
When we click the Book controller in swagger documentation, it looks like below
Customizing method names
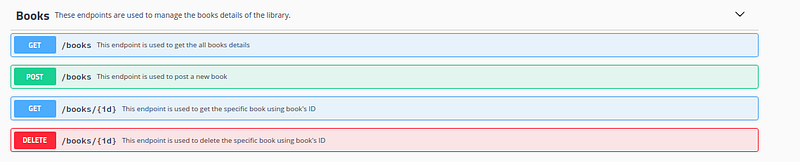
Method names are there instead of endpoint details. We have to add the endpoint details as well. A single endpoint may have multiple operations, For that, swagger gives @ApiOperation to specify the endpoint operation details as below. More details about the annotation can be found here.
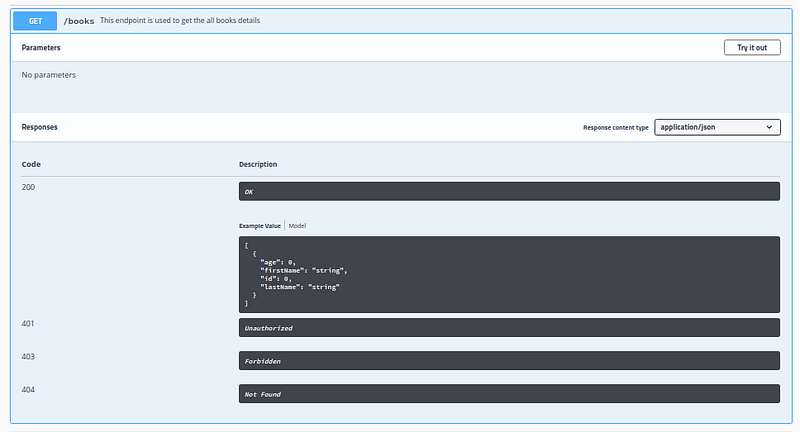
When we added this annotation, every endpoint has shown information that we gave as the value of the annotation.
When we see one particular endpoint operation, it responses like below.
Customizing API Responses
We can modify these responses using @ApiResponses and @ApiResponse annotations of swagger.
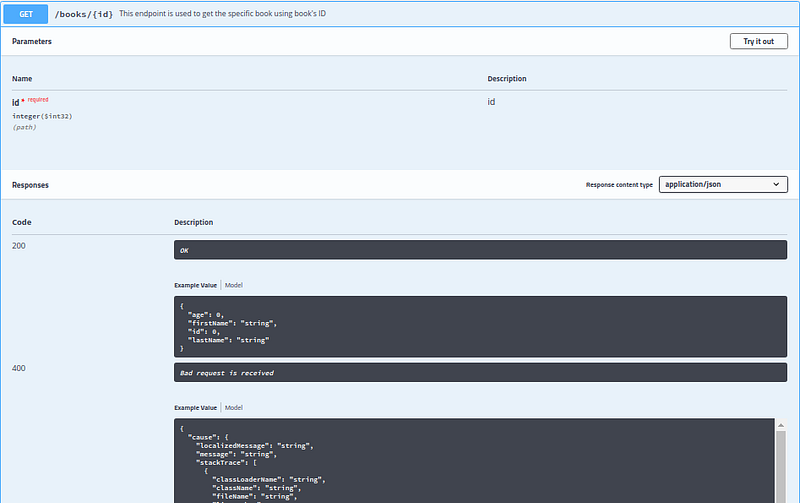
In the above code, we defined the response class as Error.class for error responses. When you develop an API, you can give the custom error class bean, which you defined. After adding those annotations, you would see the following swagger documentation.
Customizing custom error codes
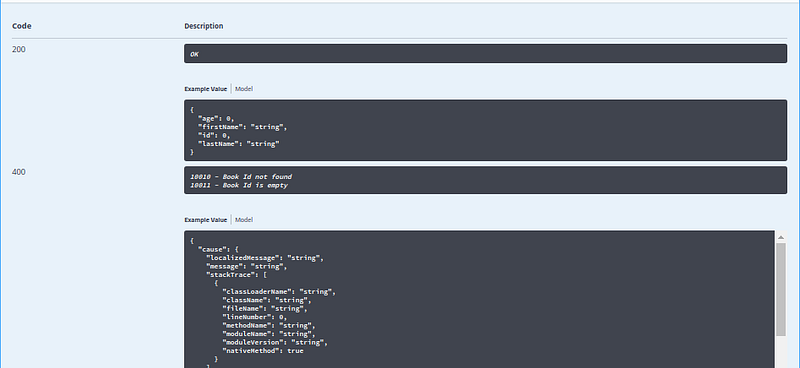
Sometimes, we may need to send many errors for the same code. For example, we have to send custom error codes for 400 HTTP code. For that, we don’t have out of box implementation, but we can use the “/n” to differentiates those things as below.
After this configuration, Our API Documentation will be changed like the below image. You can see here that the 400 HTTP code response has two custom error codes as well.
Customizing API Parameters
Parameters of an endpoint can be documented using @ApiParam annotation. When a parameter is required, we can specify that also in the annotation. We can change the description using the value field of the annotation.

Customizing UI Configurations
Sometimes we don’t need to explicit our models in the document. How can we ignore the models in API doc? It can be done using UiConfiguration bean. When we set the Depth as “-1”, it will not show the models in your Swagger documentation UI. You can add this bean in the SwaggerConfig class. More details about the UI configuration can be found here.
Path Configurations
We may need to change the base path for different endpoints. Is it possible in swagger? It is possible with PathProvider. Before going to the path provider, we need to know about the different type of paths which are in the Swagger.
Application Path
As springFox defines, the Application path is the actual base path serving the API (not the swagger documentation).
Documentation Path
This is the base path to the swagger documentation. Typically docs are served from <yourApp>/api-docs so a relative resourceListing path will omit the api-docs. As an example, the absolute path is “localhost:8080/api-docs” and the relative path is “/”.
ResourceListingPath
This is the path Corresponds to the path attribute of a swagger Resource Object (within a Resource Listing).
Operation Path
The relative path to the operation, from the base path, which this operation describes. The value should be in a relative (URL) path format.
Customize the base path of the endpoint
Whenever we need to change the base path for the endpoints, we have to manipulate the operation path. We will not change the documentation path and the application path since we aim to change the base path of the endpoints.
We need a PathProvider instance for that, I have created a new class that inherits the AbstractPathProivider since abstractPathProvider implements the pathProvider interface. This custom path provider class is only used by the swagger documentation so that we can create this class as an inner class of SwaggerConfig class.
When we implement a class with pathProvider interface, we need to override applicationPath(), documentationPath() and operationPath() methods.
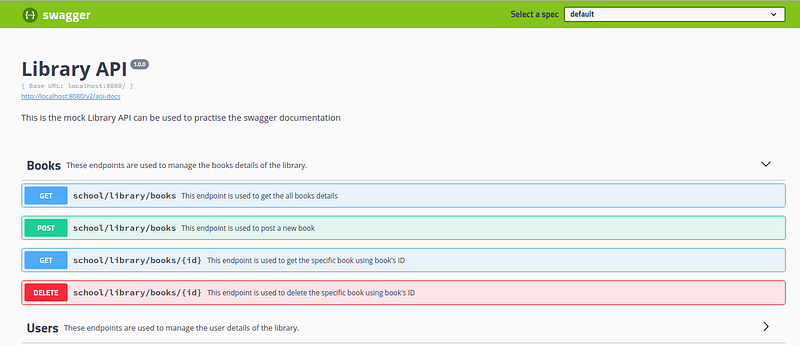
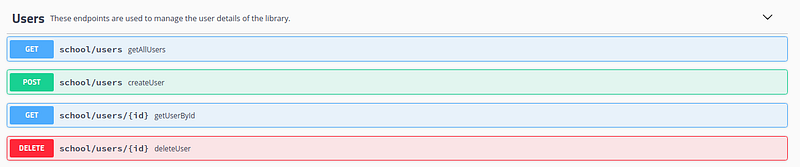
We need to override the method getOperationPath to give different base paths. I changed the base path of the books, books/{id} endpoints to “school/library” and the base path for users to “school”.
Then we need to pass this CustomPathProvider instance to the docket bean as below. We need to ServeltContext bean to get the application path; that’s why we autowired the servletContext.
After these changes, our API looks like below.
With Swagger, we can customize the controller information, endpoint information, response information, parameters information and we looked at some other things such as how we can filter the controllers, paths, how we can hide the models from the document, how we can customize the base paths of the endpoints. So hopefully, We touched the things that are needed when a Spring boot API is documented.
This github repository “end-point” has the all above work. You can start from this “start-point” branch since the “start-point’ branch doesn't have any configuration for swagger. If you follow this article, then you will end up in the “end-point” branch of the repository. Happy Documenting guys!!!


0 Comments